
Some desserts are more than just sweet endings—they’re experiences. This Vegan Sticky Toffee Pear Pudding is one such indulgence. With its tender sponge infused with dates and pears, a rich spiced toffee sauce, and a delightful coconut crunch topping, it’s a celebration of flavors and textures that dance together beautifully.
The Inspiration Behind the Pudding
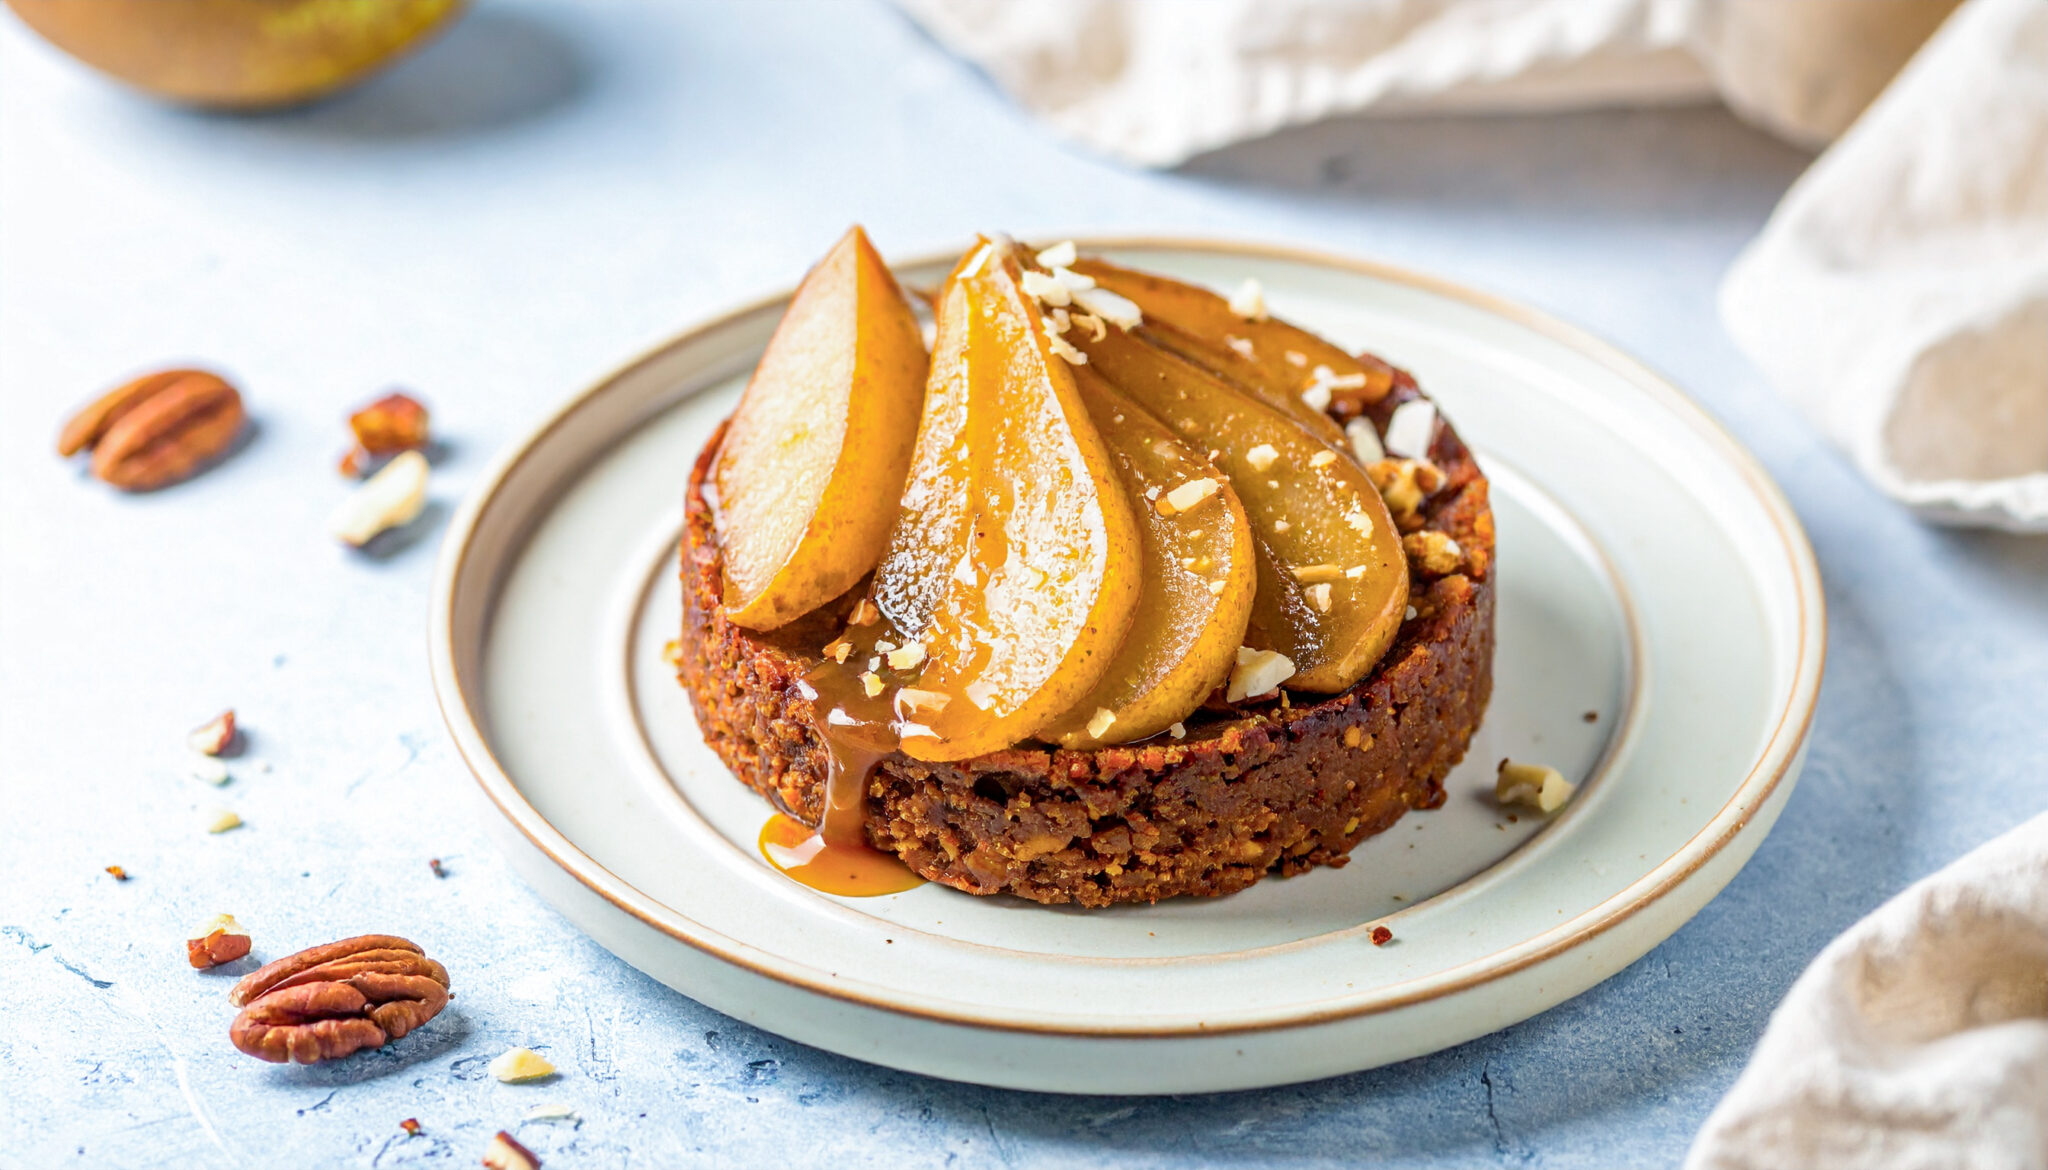
Inspired by the classic sticky toffee pudding, we wanted to create a plant-based version that didn’t compromise on taste or texture. The addition of pears adds a subtle sweetness and moisture, while the coconut crunch topping introduces a delightful contrast to the rich, gooey toffee sauce.
Crafting the Coconut Crunch Topping
The coconut crunch topping is a simple yet flavorful addition. Made with shredded coconut, a touch of brown sugar, and a hint of vanilla, it bakes up golden and crisp, providing the perfect contrast to the soft, spiced sponge below.
Preparing the Spiced Toffee Sauce
The spiced toffee sauce is where the magic happens. Combining coconut cream, brown sugar, and a blend of warming spices like cinnamon and nutmeg, this sauce simmers to a rich, golden consistency. A pinch of salt enhances the flavors, creating a balanced and indulgent topping for the pudding.
Serving Suggestions
Serve this pudding warm, drizzled with the spiced toffee sauce and topped with a generous sprinkle of coconut crunch. For an extra touch of indulgence, pair it with a scoop of vegan vanilla ice cream or a dollop of coconut whipped cream.
A Vegan Delight
This dessert is entirely plant-based, making it suitable for those following a vegan diet. It’s a testament to the fact that you don’t need dairy or eggs to create a dessert that’s rich, flavorful, and satisfying.
Ingredients
For the Pudding
- 1 cup 150 g pitted Medjool dates
- 1 cup 120 g whole wheat or gluten-free flour
- 1 tsp baking soda
- ½ tsp baking powder
- 1 tsp cinnamon
- ½ tsp nutmeg
- ¼ tsp ground cardamom
- Pinch of salt
- ¼ cup 60 ml maple syrup
- ½ cup 120 ml plant-based milk
- ¼ cup 60 ml melted coconut oil or vegan butter
- 1 tsp vanilla extract
For the Poached Pears
- 2 ripe pears peeled, cored, and halved
- 2 –3 tbsp maple syrup
- 1 tbsp vegan butter
- ¼ tsp cinnamon
For the Spiced Toffee Sauce
- ½ cup 120 ml coconut cream or full-fat plant-based cream
- ¼ cup 60 g coconut sugar or brown sugar
- 2 tbsp vegan butter
- Zest of ½ orange optional
- 1 tbsp dark rum optional
- Pinch of salt
For the Coconut Crunch Topping
- ¼ cup shredded coconut
- 2 tbsp chopped pecans or walnuts optional
- 1 tsp maple syrup
Instructions
Step 1: Prepare the Pudding
- Preheat oven to 180°C (350°F) and grease a baking dish.
- Blend dates with plant milk until smooth.
- In a bowl, whisk together flour, baking soda, baking powder, cinnamon, nutmeg, cardamom, and salt.
- Combine date mixture, melted coconut oil, maple syrup, and vanilla with dry ingredients until smooth.
- Pour batter into the prepared dish.
Step 2: Poach the Pears
- In a small pan, heat vegan butter, maple syrup, and cinnamon.
- Add pear halves and cook gently for 5–7 minutes until tender and lightly caramelized.
- Arrange pears on top of pudding, fanned for presentation.
Step 3: Bake the Pudding
- Bake for 25–30 minutes, until the pudding is set and golden on top.
Step 4: Make the Spiced Toffee Sauce
- In a small saucepan, combine coconut cream, coconut sugar, vegan butter, orange zest, rum, and salt.
- Simmer on low heat, stirring, until thick and glossy.
Step 5: Prepare Coconut Crunch Topping
- Toast shredded coconut in a dry pan until golden.
- Mix with chopped nuts and drizzle with maple syrup for a sticky crunch.
Step 6: Assemble & Serve
- Drizzle warm spiced toffee sauce over the baked pudding and caramelized pears.
- Sprinkle coconut crunch topping for texture and color.
Notes
- Make Ahead: Pudding can be baked in advance; reheat and add sauce just before serving.
- Flavor Boost: Add ½ tsp ground ginger to the pudding batter for extra warmth.
- Nut-Free Option: Skip pecans/walnuts or use sunflower seeds.
- Storage: Keeps in the fridge for 2–3 days; reheat gently before serving.
Frequently Asked Questions About Our Vegan Sticky Toffee Pear Pudding
🍐 What makes this sticky toffee pear pudding so special?
This dessert combines the rich, caramelized flavors of dates and pears with a moist, spiced sponge, topped with a crunchy coconut crumble. The addition of a spiced toffee sauce enhances the overall depth of flavor, making it a comforting and indulgent treat.
🌿 Can I make this pudding gluten-free?
Yes! To make this pudding gluten-free, substitute the all-purpose flour with a gluten-free flour blend. Ensure that all other ingredients, including baking powder and any added spices, are also gluten-free.
🥥 Is this pudding nut-free?
While this recipe does not include nuts, it’s important to check all ingredient labels for potential cross-contamination if you’re preparing it for someone with nut allergies. The coconut used in the crumble is not a tree nut, but some individuals with nut allergies may also react to coconut.
🍯 How can I adjust the sweetness?
The natural sweetness comes from the dates and pears. If you prefer a less sweet pudding, you can reduce the amount of maple syrup or coconut sugar in the recipe. Taste the batter before baking and adjust to your preference.
⏱ Can I prepare this pudding in advance?
Yes, you can prepare the pudding ahead of time. Assemble the pudding and bake it, then allow it to cool completely. Store it in an airtight container in the refrigerator for up to 3 days. Reheat before serving, and top with the spiced toffee sauce and coconut crumble just before serving.
🍽️ How should I serve this pudding?
Serve the pudding warm, topped with the spiced toffee sauce and a generous sprinkle of coconut crumble. It pairs wonderfully with a scoop of dairy-free vanilla ice cream or a dollop of coconut whipped cream.
🧊 Can I store leftovers?
Yes, store any leftovers in an airtight container in the refrigerator for up to 3 days. Reheat gently in the microwave or oven before serving. The pudding can also be frozen for up to a month; ensure it’s wrapped tightly to prevent freezer burn.
Add a Comment